Installation :
First, unzip the archive java_card_kit-2_2_2-windows.zip in the folder of your choice (C: \ JCDK in this tutorial). Unzip then four archives of the C: \ JCDK \ java_card_kit-2_2_2 into the same folder. This way you should see (among others) the following folders:
C:\JCDK\java_card_kit-2_2_2\bin:contains tools JCDK (simulator, ...)
C:\JCDK\java_card_kit-2_2_2\lib:contains the libraries of JCDK
C:\JCDK\java_card_kit-2_2_2\jc_specifications\specs\api\html:contains API JCDK (very useful)
To use the tools of JCDK command line, you must define two environment variables: JAVA_HOME contains the path to Java and JC_HOME containing the path to JCDK. It may then be useful to create a batch script to initialize these variables and update the PATH variable. For this tutorial, we create the script setvars.bat following:
Code:
@echo off set JAVA_HOME=c:\java set JC_HOME=c:\JCDK\java_c~1 set PATH=%PATH%;%JC_HOME%\bin
Then install Eclipse: unzip the archive eclipse-SDK-3.2.2-win32.zip to a folder of your choice (C: \ Program Files \ Eclipse in this tutorial).
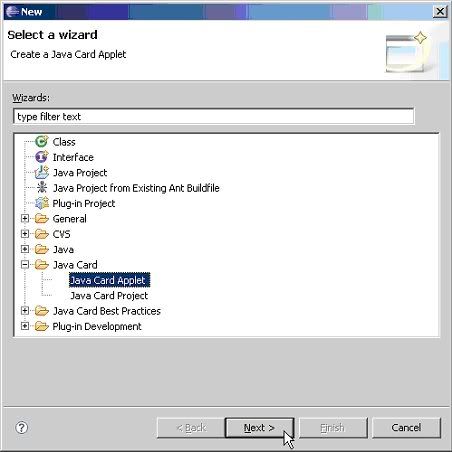
Install the plugin EclipseJCDE: Place the contents of the archive file plugins-eclipse-0.1.zip JcDe in the Eclipse plugins folder (C: \ Program Files \ eclipse \ plugins in this tutorial). At this stage, we have a development environment for creating JavaCard Applet, to simulate and create client applications.


 Reply With Quote
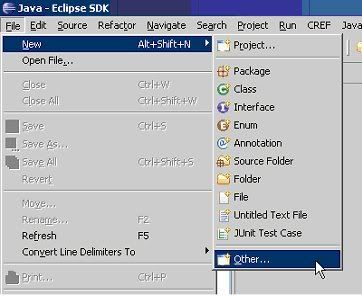


Bookmarks